DIY Flight Simulator Devices
With modern off the shelf PC technology and flight simulator software, it is
possible to build your own, high quality, helicopter simulator. In these pages you will find a lot of
ideas, guidelines and possible setups to give you a head start. Building your
own simulator is a lot of fun, instructive, and much cheaper than buying a
certified device (which is very expensive). A well built DIY helicopter simulator
can match the performance of its professional counterparts.
This page is produced with three main issues in mind. Firstly, the requirements
for building a basic flight simulator device by putting together software, a PC,
a graphics card, a screen and controls. The second aspect concerns the enhancement
of the flight experience by providing several hardware and software extensions.
The final element is the desire to stick
closely to the categories of flight simulator devices defined by the authorities.
This page is, therefore, structured like the official Flight Simulator Devices (FSD)
types.
As always, our focus is on helicopters, although the simulators described are also
fully applicable to aeroplane flight simulators as well.
1. Basic Instrument Training Device (BITD)
This is the basic setup that is used by a lot of flight simmers. It is comprised
of a PC, a screen, and input controls. It is typically built around a normal
'chair and table/office' configuration. Such a device, when constructed with the appropriate
input controls and high quality parts (pc + sw), is already an effective training tool!
So, let’s have a look at what is needed to build this device.
1.1 Good balanced PC configuration
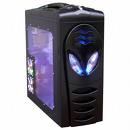
The heart of the flight simulator device is the PC. There are two important matters
to consider here. Firstly, is the system properly balanced? This means that the
performance of all of the individual components must be at more or less similar levels.
For example, it makes no sense to use the fastest CPU with a moderate hard
drive, or a high end graphics card with a dual core 2Mhz CPU system. This can't be stressed
enough, because flight simulator performance needs
all of the
critical components to perform well: CPU, RAM, hard drive, graphics card and power supply.
The second thing to consider is planning for the future. If you are starting with a
basic setup, then it is a shame to discover (after a while) that adding that
second screen reduces the overall performance way below acceptable limits. So, you should
perhaps consider your PC configuration with the future in mind. One effective strategy
is to buy a PC with enough extension slots and a power supply with enough room
for them. Also, choose a 64 bit operating system instead
of a 32 bit one, so that you can expand the RAM beyond the 4GB limit of 32 bit systems.
All of the relevant items to be considered when selecting a PC with a graphics card
appropriate for flight simulation can be found on grahics card 'introduction' and 'architecture'.
1.2 Input controls
 This is not a particularly difficult aspect for a BITD as you can use generally
available
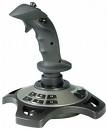
spring based controls. For our Helicopter Training Device, we need a good joystick
as a cyclic control and some form of collective control. There is, however,
one critical item:
the pedals. They are mandatory, otherwise the BITD will not be
realistic when it comes to helicopter flying. Research
has also shown that by only using visual cues, a simulator
is an effective training device when it comes to learning to control your heading while
in a hover by applying appropriate pedal input. Accordingly, you really can’t do
without them.
This is not a particularly difficult aspect for a BITD as you can use generally
available
spring based controls. For our Helicopter Training Device, we need a good joystick
as a cyclic control and some form of collective control. There is, however,
one critical item:
the pedals. They are mandatory, otherwise the BITD will not be
realistic when it comes to helicopter flying. Research
has also shown that by only using visual cues, a simulator
is an effective training device when it comes to learning to control your heading while
in a hover by applying appropriate pedal input. Accordingly, you really can’t do
without them.
For the more important aspects of input controls and information about a selection of them, visit the
input
controls page.
1.3 Displays
Not all displays are appropriate for simulation purposes. However, the selection
process can be straightforward and more information can be found on the page about displays.
1.4 Sound system
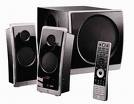 Sound is an important element for a convincing flight experience. Some add-ons
are very good at simulating noises like blade slap, overstressed gears, warning
signals, etc. As a general rule, the speaker set is more critical when it comes
to sound quality than the applied sound card.
Sound is an important element for a convincing flight experience. Some add-ons
are very good at simulating noises like blade slap, overstressed gears, warning
signals, etc. As a general rule, the speaker set is more critical when it comes
to sound quality than the applied sound card.
Note that the Microsoft Flight Simulator X supports the use of multiple sound cards.
One card is used for environmental noise (wind shear, engine, buttons,
warning signals, etc.) and feeds the speaker system. The second sound
card is used for ATC. The headphones are connected to this card.
supports the use of multiple sound cards.
One card is used for environmental noise (wind shear, engine, buttons,
warning signals, etc.) and feeds the speaker system. The second sound
card is used for ATC. The headphones are connected to this card.
This effect can also be achieved by using a USB headset. Because the OS will see
this headset as a separate USB device, you can connect the ATC traffic control program
(which is separate from your flight sim software!) to the USB headset device. The
card is used for the flight simulator sounds over your speaker set.
1.5 Software
 Of course, all of the exciting hardware we have been discussing is of no use unless there is software to bring it to life. Basically, there are two choices: FSX or
X-Plane. The decision
is yours, because you can build very good simulators with
either package. By the way,
because purchasing both the X-Plane and the FSX won’t
break the bank, you can also
use both packages, as quite a lot of simmers do.
Of course, all of the exciting hardware we have been discussing is of no use unless there is software to bring it to life. Basically, there are two choices: FSX or
X-Plane. The decision
is yours, because you can build very good simulators with
either package. By the way,
because purchasing both the X-Plane and the FSX won’t
break the bank, you can also
use both packages, as quite a lot of simmers do.
There are two things that are worth considering in more detail: the quality of
the helicopter model and the support for multiple views. To start with the former, X-Plane
comes with a more realistic helicopter flight model. This is because it doesn't
use equations to describe flight dynamics, but instead utilises a finite number of areas with aerodynamic forces acting on them to actually simulate the interaction of moving surfaces in the
air. Without going into detail here, the bottom line is
that X-Plane gives you realistic helicopter flight dynamics, while FSX provides
you with an easier flight experience. However, FSX can be extended with an excellent add-on, the Dodosim Bell Jetranger, which also makes it very realistic in terms
of its
flight dynamics (and a lot more). The only drawback here is that it is available
for only one helicopter model. So, as stated earlier, the choice is yours.
The other issue is multiple monitor support which is dealt with in section 3.2,
multiple
views.
For a comparison between flight simulation software packages, take a look at the
Helicopter Simulation Software Overview page.
1.6 Possible set-ups
The easiest set-up is built around a normal table/chair combination (a typical home office configuration). The PC is installed in a convenient location and
the display and joystick are on the desk, and the pedals on the floor. As you can see, there is very little difference to a normal (office) PC workspace.
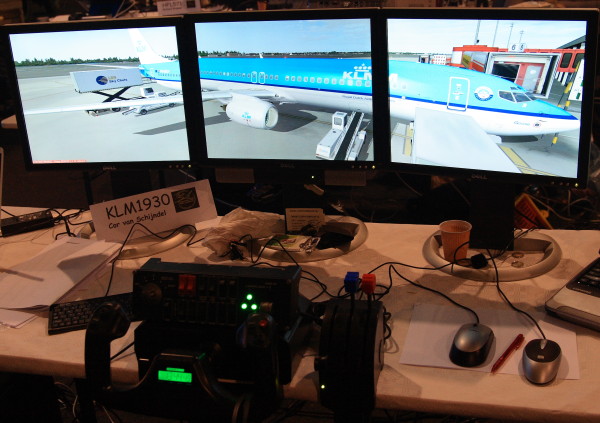
Real life example (Flight Sim Event)
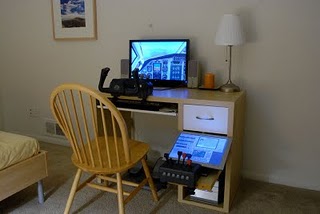
With a little help from Ikea
A possible modification is to use a second screen solely to display the instruments,
which will give you a straightforward view. This instrument display could be placed
in a pilot friendly position. Note that a second view upon which to display the
instruments doesn't use much CPU power, due mainly to its static appearance (X-Plane doesn't really support this possibility). Also, to make it more realistic, some effort could
be put into creating a more 'cockpit'-like set-up.
For example, using a gaming flight seat.
1.7 Performance fine-tuning
An important factor when creating a flight simulator with a good performance level
is the fine-tuning of the software settings. The single, most important value when
it comes to measuring performance
is the number of frames per seconds (fps). This should be around 30 to give you
a good quality simulation. The key to achieving high performance is to experiment
with the relevant settings and understand what they are doing. You can find some
guidelines about how to improve system performance
on the flight simulator performance guidelines page.
2. Flight Navigation Procedures Trainer (FNPT)
The difference between a BITD and an FNPT is the 1:1 scale mock-up of the cockpit
and the use of input controls that accurately resemble the real ones. There are
two types of FNPTs, one that resembles a specific aircraft make and model, and one
that is like a class of aircrafts (for example: piston helicopters, or turbine
helicopters, etc).
2.1 Cockpit mockup
The cockpit mock-up is a project on its own. The level of detail you want to achieve
is a matter of personal taste and also depends on whether you want to choose to
mock up a specific make and model. There are
complete mock-ups for specific models, but they are very expensive ($20,000+). You can, however, buy several parts, like overhead panels, radio stacks, and gauges that are especially designed
for simulator use. These devices connect with a USB to the flight PC and can thus be easily used
with your flight sim software. You will also find that there are welded tube frames
that can be used as the basic cockpit. An FBNPT can be achieved with one (or more) LCD display(s), or with a projector to create an out of cockpit view.
A very different approach is to buy a real (fuselage and / or) cockpit from an obsolete helicopter (try helicopters at eBay).
It should be separated from the fuselage and completely stripped down. This empty cockpit is then used to build the instrument panel with its gauges, several
panels, and the input controls, etc. Ideally, this kind of set-up also uses projectors to
achieve an out of cockpit view (section 3.3). Note that stripping a real
cockpit down can be a very time consuming project on its own! On the other hand, it will
give you a very accurate 1:1 scale model of a specific helicopter make and model.
at eBay).
It should be separated from the fuselage and completely stripped down. This empty cockpit is then used to build the instrument panel with its gauges, several
panels, and the input controls, etc. Ideally, this kind of set-up also uses projectors to
achieve an out of cockpit view (section 3.3). Note that stripping a real
cockpit down can be a very time consuming project on its own! On the other hand, it will
give you a very accurate 1:1 scale model of a specific helicopter make and model.
2.2 Input controls
This is a critical aspect when it comes to helicopter simulation, because there aren’t many products on the market, especially when it comes to the collective and
cyclic controls. There are some good tools available, but they are very expensive
(and mainly used in certified simulators). Many simmers treat the collective and
cyclic controls as a separate DIY project.
Pedals are the exception, with some good quality products available at a good price (pedals section).
2.3 Instruments, radios and panels
These are also essential parts when building a true FNPT. Fortunately, there are
some good products available that all connect with a USB to the PC. With these items,
you can fulfil
the requirement of having a realistic instrument panel, instead of using
a simulation displayed on a monitor. Because instrument panels take up a lot of display space, using real instruments
will also free up your display: you will be able to have more outside views! And you won’t
have to control switches with the mouse anymore, but can instead use real ones. For a quick start, take a look at the Flight Instruments’ page.
3.
Extensions
The set-ups from the previous sections can be extended with the following options.
3.1 Add-ons
Use add-ons to create your favourite scenery, aircraft models and traffic. As already pointed out, if you are serious about using flight simulation as a helicopter training aid, you must consider using the DodoSim add-on
(when using the FSX). You
will find more general information about add-ons on the flight simulator add-ons page.
One of the most convincing extensions enables you to create more views than simply
forward.
Note that we are talking about views and not displays, as these are two different matters. It is still possible to have a two or three display system with
only one forward view. And you can also create three different views (for example, forward,
left and right) on one display (you can easily try this yourself). Of course,
there
is a good reason to make the distinction between view and display. A view uses a
lot of computer power if it is to run at a decent frame rate. If you create a second
view, the need for power doubles. A third view triples this (assuming that the resolutions
at which the views run are all the same). So, a decent
frame rate of 30 drops to a useless 10 when using three views. Using three screens with
one view will have no consequences for the frame rate (as long as we don't change the view's resolution).
Of course, in this case, you only get a much bigger screen to watch it on, but no
more details or a wider view angle.
If what we are looking for is a wider view angle, then we need multiple views and
they
have to be implemented with two or three displays, each showing a different
view. Now it
is time for us to take a look at how the two most important software packages treat multiple
views.
3.2.1 Multiple views with FSX and X-Plane
In FSX, multiple screen support is easy, and can be accomplished with only one PC
with
the correct number of graphics
cards (e.g. four screens means two graphic cards). The set-up is easy: configure the graphics cards and screens in the Windows Configuration Panel. Then, in the FSX, you
can create several new views (from the main menu), each
with its own view angle, and drag them to the appropriate displays. That’s
it!
With X-Plane, the basic design is fundamentally different. Instead of a single PC
based solution, multiple screens require multiple PCs. This design is used
to keep up with performance requirements. So, be aware that if you want to use three
screens
with different views, you must also use three PCs, which are interconnected via a network
(LAN, messages via UDP protocol), with each PC having its own copy
of the X-Plane installed.
3.2.2 Is there really a difference?
So, at first glance, there is a big difference between FSX and X-plane in how they
support multiple views. With FSX, you get multiple monitor support based on a single
PC solution, while with X-Plane, you get multiple monitor support by only using
one PC per monitor. The PCs are connected through a network and each one of them
must have a copy of X-Plane installed. Obviously, there can be a different solution with some
hardware and budget consequences. But the idea of using a single PC for
each display is not unusual, because it helps to keep up frame rates with multiple
views. This is also the main drawback with the FSX’s one PC solution. You need a very, very powerful machine, and will probably suffer frame rates that are much
too low when using multiple views in this way. Also note that
the frame rate dictates the number of simulation runs per second. So, where
does this leave us? With FSX
you should probably also use one PC per display
if you want multiple views while maintaining acceptable
frame rates! It should not come as a surprise that there
is an add-on for FSX which implements multiple views with multiple PCs (each PC should have a copy
of the FSX installed) that are
connected through a network, similar to the X-Plane solution. You can find this at
Wide View.
3.2.3 Some general remarks
First of all, when practising hovering in a helicopter, peripheral vision is critical.
It is also well known that in simulators peripheral vision is the most important parameter
when it comes to training effectiveness. So, multiple views will help you, especially in terms of helicopter flying. Helicopters are also known for their
superior
wide (cockpit) view when compared to aeroplanes. These are, therefore,
reasons enough to consider implementing multiple views.
When implementing more than one view, you will have to use multiple displays or projectors. To get a homogeneous result, it is important to use the same make and
model of display or projector system, or you will get colour differences which can destroy the notion of one large viewing area.
When using a projector system, be sure that you have enough room at your disposal.
It is best to do a sketch and then check the minimum throw/distance the projector
must provide, before actually buying one (unless you have plenty of room).
3.3 Big viewing area and out of cockpit view
Another extension to your simulator which gives a big 'wow'-effect is the use of
a projector. This will do two things: give you a really large viewing area and an
out of
cockpit view. Both create a more realistic flight experience. Not all projectors are suitable, so some research is necessary. The relevant selection
criteria are dealt with on the projector introduction page.
A projector system still isn't the same as getting a wider view angle, which can
only be realised with multiple views (see the section about
multiple views above). However, implementing multiple views with projectors
and a cylindrical view screen (180 degrees divided by three views of 60 degrees
each) provides the best of both worlds: a surround view and the big wow-effect.
A cylindrical view screen (or a spherical one) is supported by the software settings
of X-Plane (projection and alignment options), although it requires a level 2 key
(approximately $500). With FSX projectors should be used that support curved screens
(with functions like warping / morphing and blending).
4. Full Fligth Simulator
At this time, we will simply publish some photos to inspire you... (to be continued).
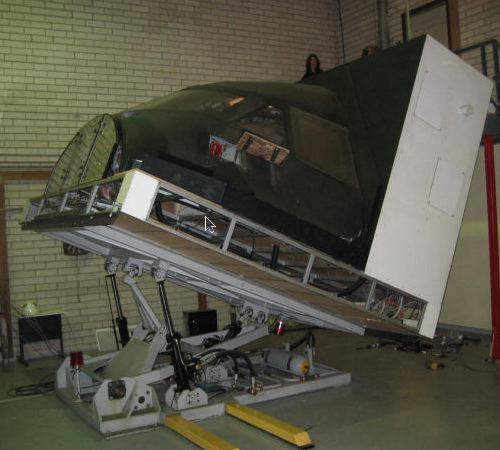 Fullsize Homemade Flight Simulator
Comments are disabled.